
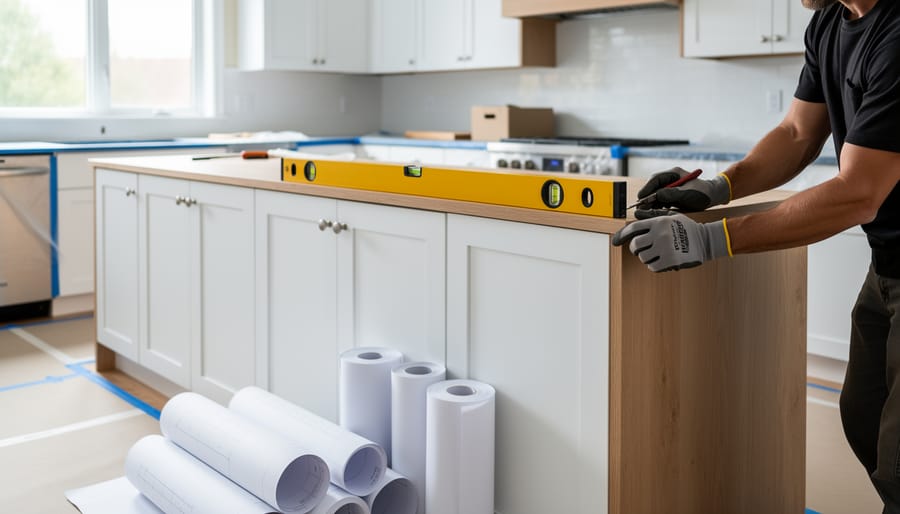
Successful kitchen cabinet installation in Waterloo before countertop fabrication requires a precise seven-phase sequence spanning preparation, leveling, attachment, and final verification. This workflow typically takes two to three days for a standard residential kitchen and demands strict adherence to plumb and level tolerances within 1/16 inch to ensure proper countertop fit and long-term cabinet integrity.
The coordination between cabinet installers and countertop fabricators represents a critical junction in kitchen renovation projects across Waterloo’s competitive residential construction market. Installing cabinets correctly before templating establishes the reference plane for all subsequent work, from stone fabrication to appliance integration. When executed properly, this phase eliminates costly callbacks, prevents material waste, and maintains project momentum through the finish carpentry stage.
The challenge lies in balancing speed with precision. Rush the installation and you risk misalignment that compounds through countertop fabrication and installation. Over-engineer the process and you create bottlenecks that delay template measurement appointments and push project completion dates. Professional installers know that the window between cabinet completion and countertop templating typically runs 24 to 48 hours, leaving little room for major corrections.
This article walks through the complete pre-countertop cabinet installation sequence used by leading Waterloo contractors, from initial site assessment through final handoff documentation. The methodology incorporates feedback from local fabrication shops on common installation errors that complicate templating, along with quality control checkpoints that catch problems before they become expensive. Whether you’re managing commercial fit-outs or residential renovations, understanding this workflow protects your reputation and project margins. Those seeking detailed specifications for cabinet selection can learn more about regional options and construction standards.
Pre-Installation Site Assessment and Preparation
Structural and Code Compliance Verification
Wall load-bearing capacity verification starts by identifying which walls in the kitchen support structural loads versus partition walls. In Waterloo’s older housing stock, particularly homes built before 1980, you’ll encounter plaster-and-lath construction, knob-and-tube wiring traces, and unpredictable stud spacing that deviates from modern 16-inch-on-center standards. Use a stud finder with deep-scan capability and confirm locations by drilling pilot holes where cabinets will mount.
Check wall plumb with a 6-foot level at multiple points across installation zones. Walls out of plumb by more than 1/4 inch over 8 feet require shimming strategies that affect cabinet depth and countertop overhang calculations. Document variances now rather than discovering them mid-installation.
The City of Waterloo Building Division requires cabinet installations to meet Ontario Building Code structural provisions, specifically addressing fastening into solid blocking or studs capable of supporting dead loads plus 150 pounds per linear foot for wall cabinets. Verify that previous renovations haven’t compromised wall structure, cut studs or removed blocking creates unsafe mounting conditions.
For kitchens in condominiums or multi-unit buildings, confirm whether building-specific requirements exceed OBC minimums. Some Waterloo condo corporations mandate engineer-stamped drawings for structural modifications, even when only installing cabinets.
Mark approved stud locations with painter’s tape at the cabinet mounting height. This visual reference prevents fastener misplacement during installation and ensures your team anchors every cabinet into solid framing, not just drywall.
Utilities and Rough-In Confirmation
Before a single cabinet gets hung, verify that every utility rough-in is complete and correctly positioned. Misplaced plumbing or electrical boxes discovered mid-installation force costly rework and project delays.
Start with plumbing verification. Check that water supply lines for the sink terminate 2-3 inches behind the cabinet back at the correct height, typically 20-22 inches above the finished floor for base cabinets. Confirm drain rough-in positioning allows proper connection without interfering with cabinet structure. For dishwasher installations, verify the drain loop location and hot water supply stub-out align with the appliance cavity. In Waterloo’s older homes, cast iron drain stacks may require adapter fittings; confirm these are installed before cabinets block access.
Electrical rough-in demands equal scrutiny. Outlet boxes for small appliances must sit 4 inches above the planned countertop height, positioned to avoid cabinet stiles and uppers. Under-cabinet lighting circuits should terminate where specified in the electrical plan. Range and microwave circuits require verification of voltage, amperage, and box placement that won’t conflict with cabinet mounting points.
Gas rough-ins for ranges need shutoff valves accessible after cabinet installation, never hidden behind permanently fixed units. Coordinate with your gas fitter to confirm valve height and lateral position before proceeding.
Document any discrepancies immediately. Correcting rough-in errors now takes hours; fixing them after cabinets are installed takes days.
Tools, Materials, and Equipment Checklist
Assembling the right toolkit before starting cabinet installation separates professional contractors from those who make expensive mistakes. In Waterloo’s mix of new builds and century-home renovations, you’ll encounter varied wall conditions that demand both standard and specialized equipment.
Essential Hand Tools
A 4-foot and 6-foot level are non-negotiable for verifying cabinet alignment. You’ll need a quality stud finder that detects both wood and metal, critical in older Waterloo homes with steel studs or lath-and-plaster walls. Keep composite shims, not wood, they won’t compress over time. A reliable tape measure (25-foot minimum), combination square, chalk line, and marking tools round out measuring equipment.
For fastening and adjustment work, pack multiple screwdriver sets (including cabinet-specific square drives), adjustable wrenches, clamps (bar and C-clamps), a coping saw for scribing, and a block plane for fine adjustments.
Power Equipment and Fasteners
Your cordless drill needs sufficient torque for lag screws into studs; bring backup batteries. A circular saw or jigsaw handles field modifications. If the job includes custom panels or fillers, a miter saw ensures clean cuts.
Fastening hardware varies by cabinet weight and wall type. For standard drywall-over-stud installations, use 2.5-inch to 3-inch cabinet screws driven into studs. Hollow walls require toggle bolts rated for cabinet loads. Bring construction adhesive for additional stability on base units. Waterloo’s older brick homes may need masonry anchors if you’re fastening to exterior walls.
Cabinet-Specific Materials
Stock cabinet shim packs (both composite and plastic), corner braces, and filler strips matching cabinet finish. For frameless European cabinets, bring cam-lock installation tools and shelf pins. Face-frame cabinets need face-frame screws and pocket-hole plugs.
Effective procurement management means ordering specialized hardware, soft-close hinges, drawer slides, toe-kick ventilation grilles, weeks ahead, since Waterloo suppliers don’t always stock every cabinet system’s proprietary components.
Keep a laser level for establishing reference lines across long runs, and bring protective materials (cardboard, drop cloths) to shield finished cabinets once installed.
Critical Safety Protocols and Stop Conditions
Cabinet installation demands strict adherence to safety standards that protect crews and maintain WSIB compliance. Before work begins, verify that all team members understand proper lifting techniques: cabinets over 50 pounds require two-person lifts, with bent knees and straight backs. Position one installer at each end of the cabinet, coordinating the lift verbally to prevent sudden shifts that cause back injuries.
Ladder and scaffolding protocols are non-negotiable for wall cabinet installation. Use Type IA ladders rated for 300-pound capacity minimum, positioned on stable flooring with all four feet making solid contact. Never stand on the top two rungs. For extended upper cabinet runs, rolling scaffolding provides safer access than repeated ladder repositioning. Maintain three-point contact when climbing, and keep tools in belts or buckets rather than carrying them by hand.
Power tool safety centers on blade guards, proper grounding, and dust control. Keep circular saw and jigsaw guards operational, never pinned back for convenience. Ground all tools through GFCI-protected circuits, especially critical in kitchens where plumbing creates shock hazards. Wear eye protection during all cutting operations and hearing protection when running routers or saws for extended periods.
Additional stop conditions include discovering asbestos-containing materials during demolition work common in older Waterloo homes, or encountering load-bearing walls not identified in plans. Document these conditions, notify the project manager, and await structural assessment or environmental remediation. Comprehensive jobsite safety requires recognizing when conditions exceed your crew’s scope and require specialist intervention before cabinet installation continues.
Step-by-Step Cabinet Installation Process
Layout Marking and Reference Line Establishment
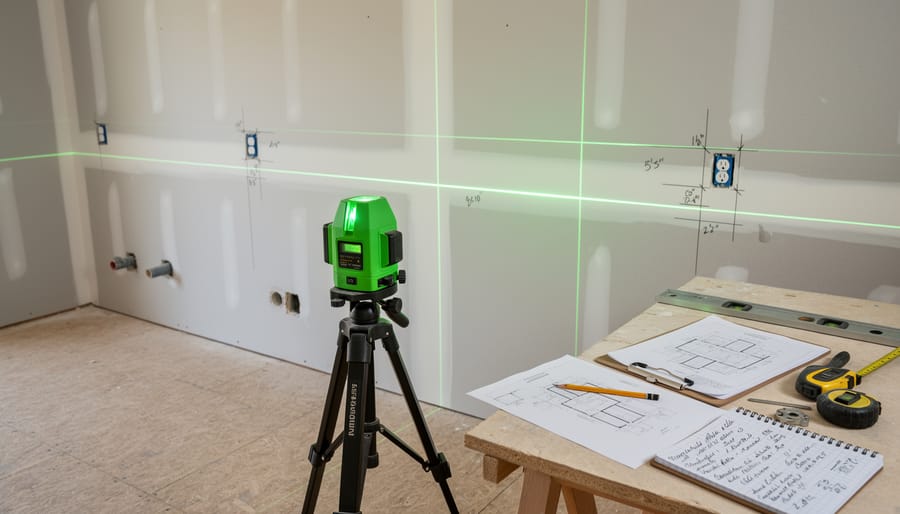
Accurate reference lines form the foundation for cabinet installation success. Begin by locating the room’s highest point using a laser level positioned at floor level across the entire kitchen perimeter. This high point determines your base reference.
Mark a level line 34½ inches above the highest floor point, standard base cabinet height without countertop. Use a rotary laser or cross-line laser to project this line continuously around all walls receiving cabinets. Verify with a 6-foot level at multiple points; deviation exceeding 1/16 inch over 10 feet requires wall correction before proceeding.
For wall cabinets, establish a second reference line 54 inches above the finished floor, typical upper cabinet bottom height. Mark stud locations along both reference lines using a stud finder, then physically verify by driving finish nails at each location. Mark stud centers with vertical pencil lines extending 6 inches above and below each reference line.
Transfer cabinet layout dimensions from plans to walls using a story pole or direct measurement. Mark cabinet boundaries, end panels, and filler strip locations. Indicate appliance positions and note any wall irregularities that require compensation.
Document the layout with photos showing all reference lines and markings. This visual record prevents errors during installation and aids coordination with countertop fabricators. Verify all measurements against plans before proceeding to cabinet installation.
Upper Cabinet Installation Sequence
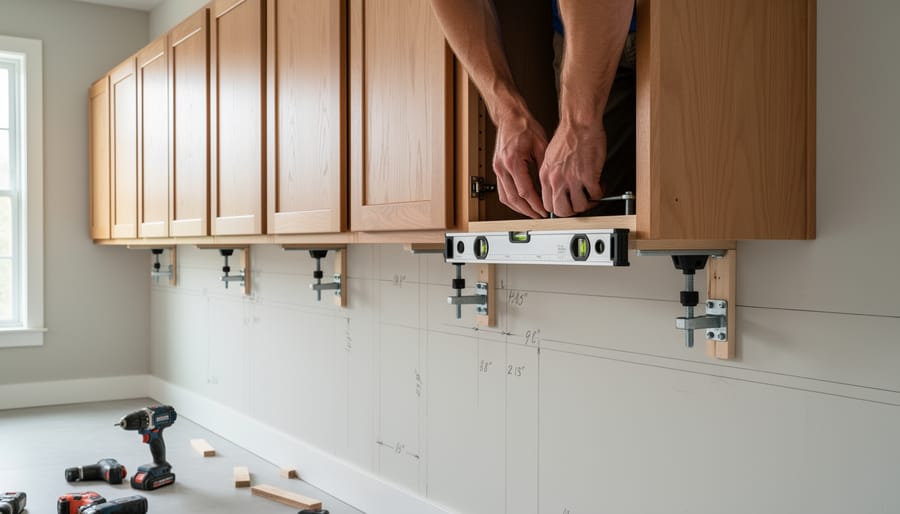
Start by installing upper cabinets before base units to avoid working over completed base cabinets and countertops. This sequence gives you unobstructed access and prevents damage to lower installations.
Locate and mark all wall studs within your layout area using a stud finder. Mark stud centers clearly at your reference line height. Install a temporary ledger board, typically a straight 1×3 or 1×4, along your level reference line to support cabinet weight during installation. Secure the ledger into wall studs with 3-inch screws. This board keeps cabinets at consistent height while you work.
Begin with corner cabinets if your layout includes them. Position the corner unit on the ledger, check for level and plumb with a 4-foot level, and shim behind the cabinet where it meets the wall if needed. Drive 2.5-inch screws through the cabinet’s mounting rails into studs, minimum two screws per stud location. Never rely on drywall anchors for primary cabinet support.
Work outward from corners, installing adjacent cabinets one at a time. Before securing each unit, clamp it to the previously installed cabinet and verify the face frames are flush using a straightedge. Check that cabinet fronts align perfectly, any misalignment now becomes permanent once countertops are templated.
Drill pilot holes through mounting rails to prevent splitting, particularly in hardwood frames. Install screws gradually, rechecking level as you tighten. Minor adjustments with shims behind mounting points correct small irregularities without forcing cabinets out of plumb.
Remove the ledger board only after all upper cabinets are fully secured and verified level.
Base Cabinet Installation and Leveling
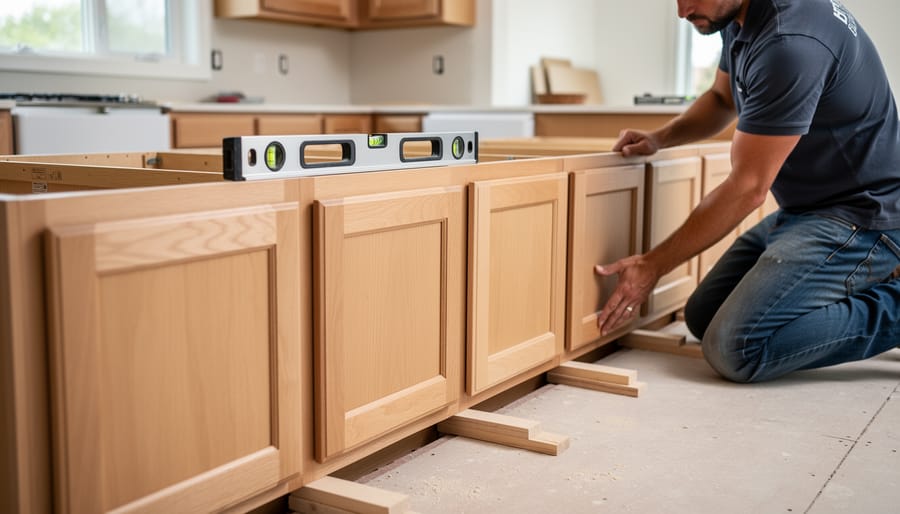
Start at the highest point of the floor, this becomes your zero-elevation reference for the entire base cabinet run. Set the first corner cabinet here without shims, then work outward to maintain consistent top heights across all units.
Place the next cabinet and check for level both front-to-back and side-to-side using a 4-foot level. Waterloo’s older homes often have floor dips exceeding 3/4 inch over a 10-foot run, so expect significant shimming. Slide composite shims under the cabinet base at each corner and mid-span until the unit reads perfectly level. Never force cabinets level by torquing them into the wall, this twists the box and creates problems when doors are hung.
Clamp adjacent cabinets together at the face frames, ensuring the fronts are perfectly flush. Drill pilot holes through the stiles and drive 2-1/2 inch screws to join the units. Check that this connection hasn’t pulled either cabinet out of level; adjust shims as needed.
Secure each cabinet to wall studs with 3-inch screws through the hanging rail, driving at least four fasteners per unit. Verify the cabinet remains level after each screw is tightened, overtightening can pull the cabinet toward an uneven wall.
For peninsula or island cabinets with no wall attachment, secure the base to the floor using construction adhesive and lag bolts through the cabinet bottom into floor joists. Score shims flush with cabinet edges using a utility knife, then snap off the excess. The result should be rock-solid units that won’t shift during countertop templating.
Cabinet Connection and Alignment Techniques
Joining cabinets correctly determines whether you achieve a seamless run or deal with visible gaps and misaligned doors. Start by clamping adjacent units together at the face frames before driving screws. Position clamps at the top, middle, and bottom to pull faces flush while checking alignment with a straightedge across the front.
Drill pilot holes through the stiles into the adjacent cabinet frame, typically three to four per side. Use 2½-inch cabinet screws rather than drywall screws, they resist stripping and provide stronger holding power. Drive screws from inside the less visible cabinet when possible, and countersink slightly so screw heads sit flush without protruding.
Check each connection with a 4-foot level held across face frames. Any discrepancy shows immediately. If frames don’t align perfectly, loosen wall fasteners on one cabinet, adjust with shims behind the frame, then retighten. This adjustment becomes nearly impossible after countertops arrive.
For gaps wider than ⅛ inch between cabinet boxes and walls, install filler strips cut to match the cabinet finish. Scribe these pieces to irregular wall surfaces by holding a compass against the wall and tracing its profile onto the filler. Plane or sand to the scribed line for a tight fit.
Adjust doors before templating begins. Each door should have consistent ⅛-inch reveals on all sides. Modern hinges have three adjustment points: in-out, up-down, and side-to-side. Make incremental adjustments and check operation through the full swing. Drawers should glide smoothly without binding, with even spacing when closed.
Quality Verification and Pre-Countertop Inspection
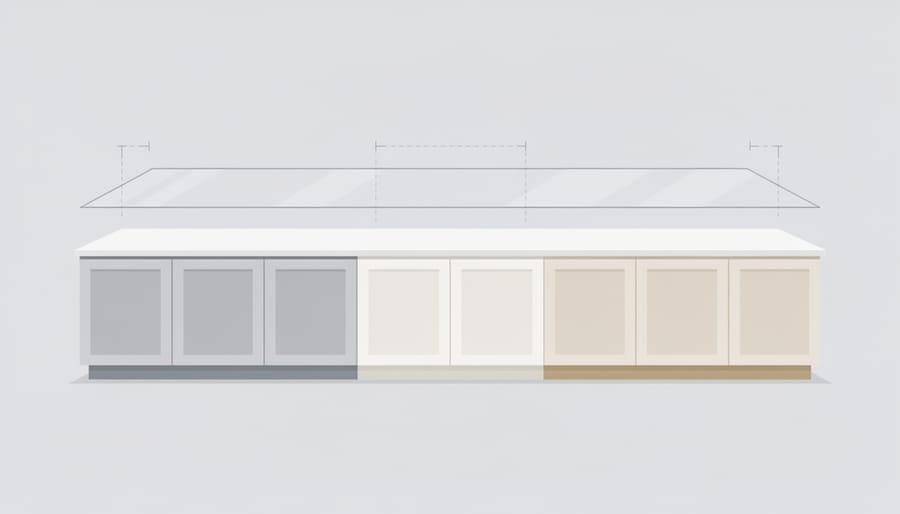
Before countertop fabricators arrive for templating, run a thorough verification sequence that catches installation errors while corrections are still straightforward. Start with a comprehensive level check across all cabinet runs, place a 6-foot level on base cabinet tops to confirm they’re within 1/8 inch across the entire span. Any deviation beyond this tolerance will telegraph directly to the countertop and create visible lippage at seams or appliance gaps.
Verify plumb on all cabinet faces using a 4-foot level, checking both side-to-side and front-to-back planes. Wall cabinets that lean even slightly forward will create clearance issues with upper appliances and make door operation problematic. Base cabinets must be plumb to ensure proper reveal between doors and drawer fronts after countertops add weight to the structure.
Measure and document critical dimensions that countertop fabricators need. Confirm the distance from the wall to the front edge of base cabinets matches specifications, typically 24 inches for standard depth bases. Check that corner cabinets allow proper overhang without dead space, and verify appliance openings match manufacturer specs exactly. A dishwasher opening that’s 1/4 inch too narrow becomes your problem, not the appliance installer’s.
Test all mechanical fastenings by applying firm pressure to cabinet connections. Joints between units should show no movement, and wall attachments should feel solid without flexing. Open and close every door and drawer to confirm smooth operation, binding now indicates misalignment that countertop weight will worsen.
Walk through the installation with your site supervisor and create a punch list of any corrections needed. Address these items immediately, because once templaters measure and fabricators cut stone or quartz to your cabinet positions, you own those dimensions. Photograph the completed installation from multiple angles as documentation, and obtain written sign-off from the general contractor or homeowner before scheduling the template appointment.
Coordination with Countertop Fabricators and Next Phase Planning
Once cabinet installation is complete, establish clear handoff protocols with countertop fabricators to ensure seamless transition between project phases. Schedule templating appointments only after final cabinet inspection confirms all units are level, plumb, and securely fastened. Provide fabricators with detailed documentation including cabinet specifications, overhang requirements, backsplash heights, and any specialty cutouts for sinks or cooktops.
Protect installed cabinets immediately after your team vacates the site. Cover cabinet tops with corrugated cardboard or protective sheeting, tape cabinet doors and drawers closed to prevent damage, and install corner guards on exposed units. Mark any areas requiring special attention during templating, such as out-of-square walls or intentional gaps.
Coordinate timeline expectations with the countertop contractor, understanding that templating typically occurs within 48-72 hours of cabinet completion, with fabrication and installation following 7-10 days later depending on material selection. Confirm site access arrangements, required utilities for installation day, and responsibility for debris removal. Document final cabinet measurements and photograph the installation before templating begins, creating a record that resolves potential disputes about pre-existing conditions. Ensure the homeowner understands the transition timeline and any required site preparations between phases.
Precision in cabinet installation sequencing isn’t just best practice, it’s the difference between a smooth countertop installation and costly project delays. Every measurement verified, every shim properly placed, and every cabinet secured to exact specifications creates the stable foundation countertop fabricators need to deliver flawless results. Waterloo’s competitive renovation market leaves no room for callbacks or rework.
The pre-countertop phase represents your last opportunity to correct structural issues, ensure perfect level and plumb, and establish the precise substrate countertops depend on. Contractors who rush this stage inevitably face templating problems, fit issues, and client frustration. Conversely, thorough execution of the installation sequence outlined here positions your team for efficient countertop coordination, on-time project completion, and the repeat business that sustains construction firms in this market.
How long should I wait between cabinet installation and countertop templating?
Allow 24-48 hours for cabinet settling and final adjustments before scheduling templating. This ensures all fasteners have fully tightened and any minor shifts are addressed.
What measurements must countertop fabricators verify before templating?
Fabricators need cabinet run lengths, diagonal measurements for square verification, overhang specifications, and sink/appliance cutout locations. Provide these in writing alongside physical access.
Can countertop installation proceed if cabinets aren’t perfectly level?
No. Countertops require level cabinets within 1/8 inch tolerance across runs. Out-of-level installations cause cracked countertops, poor seam alignment, and fabricator liability issues.
Who coordinates the handoff between cabinet and countertop trades?
The general contractor or project manager schedules this transition, confirms cabinet readiness, arranges site access, and ensures protective measures are in place.
Your reputation rests on details competitors overlook. Waterloo clients expect contractor teams who understand that cabinet installation quality directly determines countertop success, project timelines, and final results. Master this sequence, execute it consistently, and you’ll build the track record that separates industry leaders from the rest.
