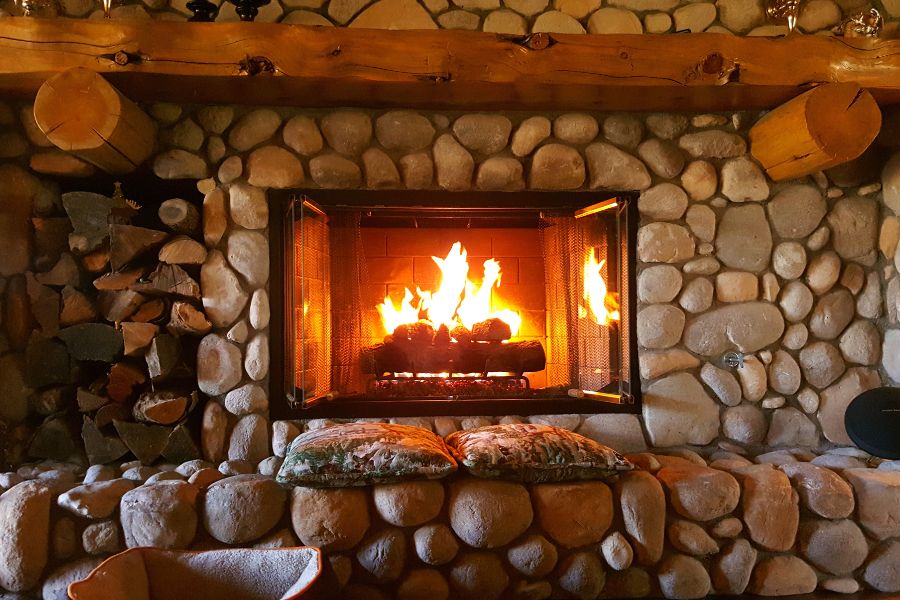
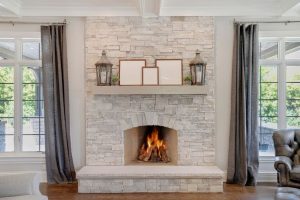
Let’s face it. Fireplace improves the ambiance of any living space. And, of course, it fills a room with warmth. Creating a fireplace frame makes it even better. It will transform your living space into a cozy, inviting centerpiece. Whether crafting a traditional fireplace wall or installing a modern electric fireplace, knowledge is the first step to a successful DIY project. If you don’t know how to get started, let’s remedy that in this article. Our complete guide simplifies the process, providing step-by-step directions to create your fireplace surround, catering primarily to those pursuing a DIY electric fireplace. With careful planning and execution, your fireplace will be perfectly set in no time. Without further ado, let’s get to the good part.
What You Need To Do Before Building a Fireplace
You don’t necessarily need a construction firm to make a fireplace frame. But first, you need to be professional and take note of the following preliminary steps:
Determining Fireplace Type
- Assess your living space and preferences between traditional and electric fireplaces.
- Understand a DIY electric fireplace’s unique benefits and considerations, including ease of installation, maintenance, and the absence of real flames.
Design and Structural Planning
- Decide if you’re constructing an entire fireplace wall or a simpler fireplace surround, as this decision dictates your project’s scale and required materials.
- Sketch your design, considering the fireplace insert’s dimensions and location. It has to complement your room’s aesthetics.
Technical and Safety Considerations for Electric Fireplaces
- Plan for electrical connections; identify nearby power sources and consider professional consultation for safety.
- Explore the heating elements of your electric fireplace and note their functionality and safety protocols.
Compliance with Local Regulations
- Investigate local building codes and obtain necessary permits—legal requirements vary by location and influence your project significantly.
- Make sure your plan complies with safety standards to prevent potential hazards.
These preliminary considerations boost your chances of successfully making a fireplace frame to elevate your home’s atmosphere.
Next Step- Gathering Materials and Tools
Before building your fireplace, you must assemble all the necessary materials and tools to promote a streamlined and efficient process.
Whether enhancing an existing fireplace or creating a fake one with an electric insert, your preparation must be meticulous. Here’s what you need for your DIY fireplace project:
Materials
- Wood Screws: Essential for securing the frame and creating a robust construction.
- Drywall Sheets: Needed for covering the entire wall or designated area around the fireplace.
- Drywall Mud: Helps create a smooth, seamless surface on the drywall.
- Drywall Tape: Used for covering joints between drywall sheets, improving structural integrity.
- Wood Glue: For reinforcing connections between wood pieces, providing additional stability.
- Paint/Primer: To provide a finished, professional look that matches your interior design.
- Electric Insert: The centerpiece of your DIY electric fireplace, providing the look of a traditional fireplace without real flames.
- Space Heater (optional): For instances where the electric insert doesn’t provide heat, you can place a space heater discreetly within the construct.
Tools
- Drywall Knife: A crucial tool for cutting, shaping, and trimming drywall sheets.
- Nail Gun: Greatly speeds up securing wood and other materials together.
- Screwdriver/Drill: Needed for driving wood screws securely into place.
- Tape Measure: Critical for accurate measurements throughout the entire project.
- Level: Keeps your fireplace perfectly horizontal and symmetrical.
- Sandpaper/Sander: For smoothing wood surfaces and nail holes before painting.
- Saw: Needed for cutting wood to your specific measurements.
Getting Started with Site Preparation
Preparing your site is another foundational step in securing the success of your project to build a fireplace, be it a traditional or a DIY electric fireplace.
Area Assessment
- Measure the designated space, ensuring the fireplace insert and framing fit perfectly.
- If you’re working around an existing fireplace, assess its condition and dimensions. For a fake fireplace, determine the ideal visual appeal and convenience position.
- Plan electrical access for the electric insert or space heater. Like we said earlier, make sure there’s a power source nearby.
Prepping the Space
- Clear the entire wall or the area where you want to fix the fireplace and remove any obstructions, decorations, or furniture.
- Cover the floor and nearby furniture with protective sheets to prevent damage from drywall mud, wood glue, or paint.
- Mark the wall with the exact measurements for your project using a level to maintain straight lines.
Safety Precautions
- Turn off power to the area if you’re working near electrical outlets or wiring.
- Keep a first-aid kit accessible for any minor injuries.
- Make sure the area is well-ventilated if you use strong adhesives or chemicals.
The Framework Construction
Constructing the framework is a critical phase in your DIY fireplace journey. It lays the foundation to house your real fireplace or electric insert. Precision, patience, and adherence to safety standards are essential during this stage.
Building the Base
- Use a stud finder to locate and mark the studs in the back wall. This step ensures your frame has the necessary support.
- Assemble the base using quality wood. Then keep all pieces securely connected with wood screws and glue in the pocket holes for additional stability.
- Check for level and plumb after securing each piece, making adjustments as necessary.
Erecting the Frame
- Build the frame on the floor, then raise it against the back wall, or construct it directly on the wall, depending on your design and space constraints.
- Secure the frame to the studs in the back wall using wood screws, ensuring it’s firmly anchored.
- Add cross supports between the vertical studs for structural integrity and potential shelving or decor niches.
Finishing Touches
- All visible nail holes should be filled with wood filler and lightly sanded once dry.
- Apply a primer to the wood, and once it has dried, follow up with your choice of paint or stain.
- Add crown molding to the top of the fireplace frame, securing it with nails and adhesive for a professional finish.
Preparing for Insert Integration
- If installing an electric insert, make the frame dimensions precisely match the insert for a seamless fit.
- For a real fireplace, consult a professional for proper ventilation to meet all fire safety regulations.
Integrating the Fireplace Unit (if applicable)
The integration phase is where your fireplace, whether a cozy real fireplace or a convenient electric model, comes to life.
Setting the Fireplace
- Slide the insert into the frame for electric fireplaces, making it fit snugly and securely.
- This step involves professional installation and inspection of real fireplaces for safety and compliance with local codes.
Drywall and Seams
- Measure, cut, and attach drywall around the frame using drywall screws.
- Apply drywall tape along the joints and cover them with a layer of drywall mud, smoothing them out with a drywall knife.
- Allow to dry, then add a second and third coat, letting each dry before the next application.
- Install corner beads on the corner seams, secure them with spray adhesive or nails, and cover them with drywall mud for sharp, clean edges.
Decorative Embellishments
- Consider adding a mantel- you can affix this using screws or nails into the frame’s cross supports.
- Enhance the design with tile or stone around the fireplace’s opening for added style.
- Customize the hearth with unique home decor items that reflect your style.
Final Inspection and Touch-Ups
- Review the entire project for imperfections or missed spots, giving additional attention where needed.
- Ensure all components are secure and the fireplace operates correctly, making any necessary final adjustments.
With your fireplace unit integrated and all finishing touches applied, your DIY fireplace becomes a ready canvas. Cheers to years of comfort, warmth, and stylistic expression in your home.
Finalizing the Frame
We can’t help but emphasize the finishing part because it affects the final results you will get. We are certain you want a fireplace frame that hits all the boxes aesthetically.
Cosmetic Enhancements
- Inspect the fireplace surround and the entire fireplace wall for any inconsistencies in paint or minor imperfections that may need correction.
- Add any additional decorative elements you prefer, such as tile work, additional wood trim, or a custom-designed mantel that complements the style of your room.
Structural Assessment
- Re-examine all joins and fixtures to confirm that everything is solidly in place. This examination includes checking the stability of the frame, especially if the fireplace is in an existing wall.
- Verify that the electric fireplace insert (if used) sits perfectly within the frame and that all electrical components function perfectly.
Clean-Up
- Vacuum or sweep up any remaining debris from the construction process.
- Wipe down the new fireplace surround and frame to remove dust or residue from the building materials.
Final Inspection
- Conduct a final overview of how to build the fireplace frame from start to finish.
- Take pictures of different stages of your DIY fireplace project for future reference or to share your success and insights with other DIY enthusiasts online.
Safety and Maintenance Insights
- For electric fireplaces, make all wiring comply with local electrical codes and keep safe from heat sources.
- Don’t place flammable materials or items too close to the fireplace. Maintain a safe distance, as safety guidelines or the fireplace manufacturer recommends.
- If you’ve built a traditional fireplace, install smoke and carbon monoxide detectors in the room for safety.
Routine Maintenance
- For electric fireplace inserts, follow the manufacturer’s routine care and maintenance instructions. This often involves regular dusting and occasional checks on the electrical components.
- If you’ve built a traditional fireplace, annual inspections and cleaning by a professional chimney sweep are essential to prevent soot build-up. Plus, it enhances transparent ventilation systems.
Operational Safety
- Never leave an operational fireplace unattended. Always use a protective screen to prevent accidental contact with hot surfaces.
- Educate all household members, especially children, about the safety risks of a fireplace and the safe operation procedures.
- Also, take note of the emissions from the fireplace and learn how to manage it properly.
In a Nutshell
Constructing a traditional or electric fireplace adds warmth and character to your home. You can make it even better by investing in an energy-efficient fireplace.
This comprehensive guide aids DIY enthusiasts in navigating the intricate process of building a fireplace frame. From the initial planning and material gathering to the construction and final touches.
Take it a notch higher by being responsible for your safety and maintenance. This ensures your fireplace provides comfort and style for years to come. These detailed steps will enhance your living space and give you the invaluable experience and satisfaction of building your own fireplace centerpiece.